CalTopo / SARTopo
CalTopo / SARTopo
Meshtastic can integrate with CalTopo Desktop edition quite easily through the product's APRS over serial support functionality.
Configuring the Meshtastic device
To configure our Meshtastic device for this integration, we have a couple of different options, both of which utilize the Serial module:
Enabling serial over the device's USB port
meshtastic --set serial.enabled true --set serial.baud BAUD_9600 --set serial.mode CALTOPO --set serial.override_console_serial_port true
Enabling serial over an external USB to Serial adapter
meshtastic --set serial.enabled true --set serial.baud BAUD_9600 --set serial.mode CALTOPO --set serial.txd = 13 --set serial.rxd = 14
Ensure that serial baud rate is set to 9600 on both the Meshtastic device and the CalTopo / SARTopo topo.properties configuration
Setting up CalTopo / SARTopo
To setup CalTopo for Meshtastic integration using the Live Tracking via APRS, refer to the official documentation.
Example topo.properties file configuration for use with Meshtastic:

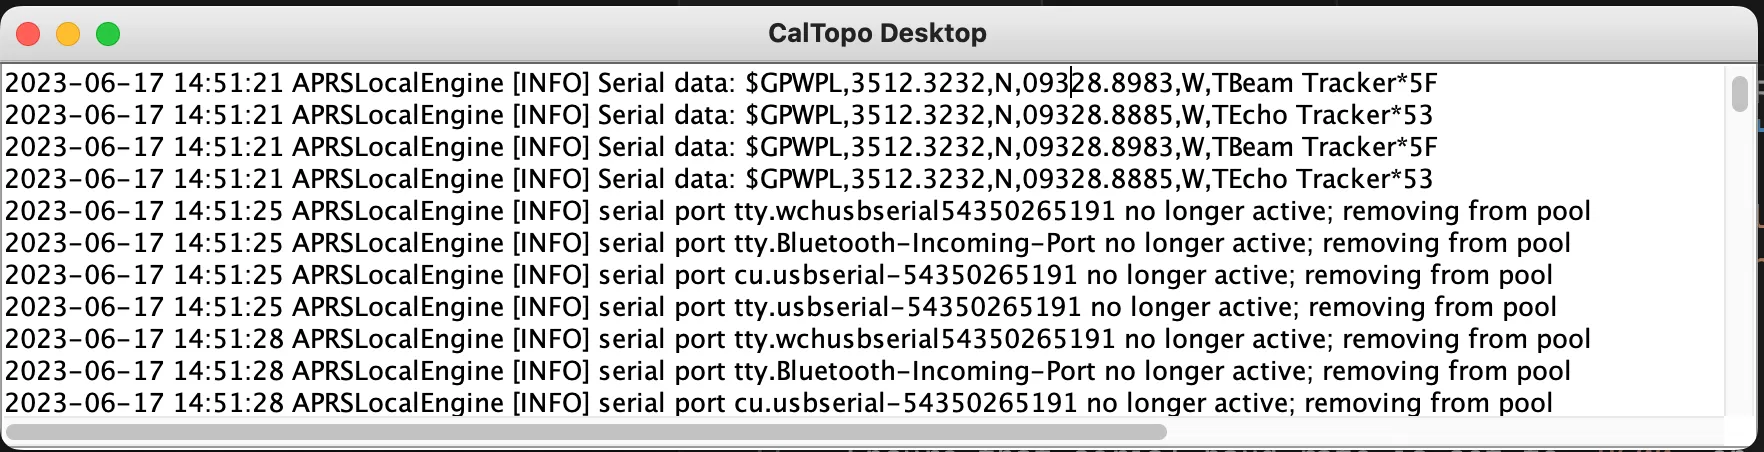
After starting CalTopo Desktop, NMEA waypoint location sentences should be streamed into the logs from the connected Meshtastic device every 10 seconds:
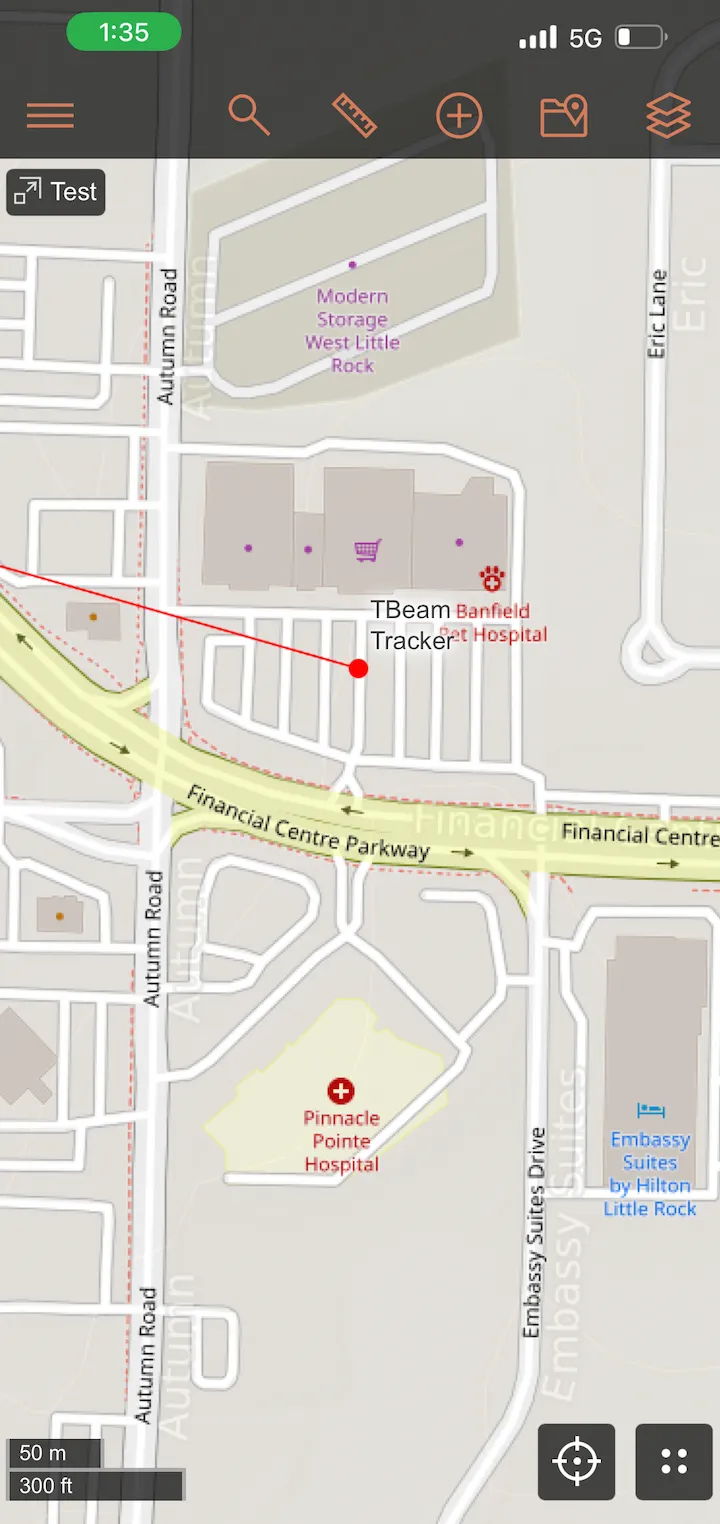
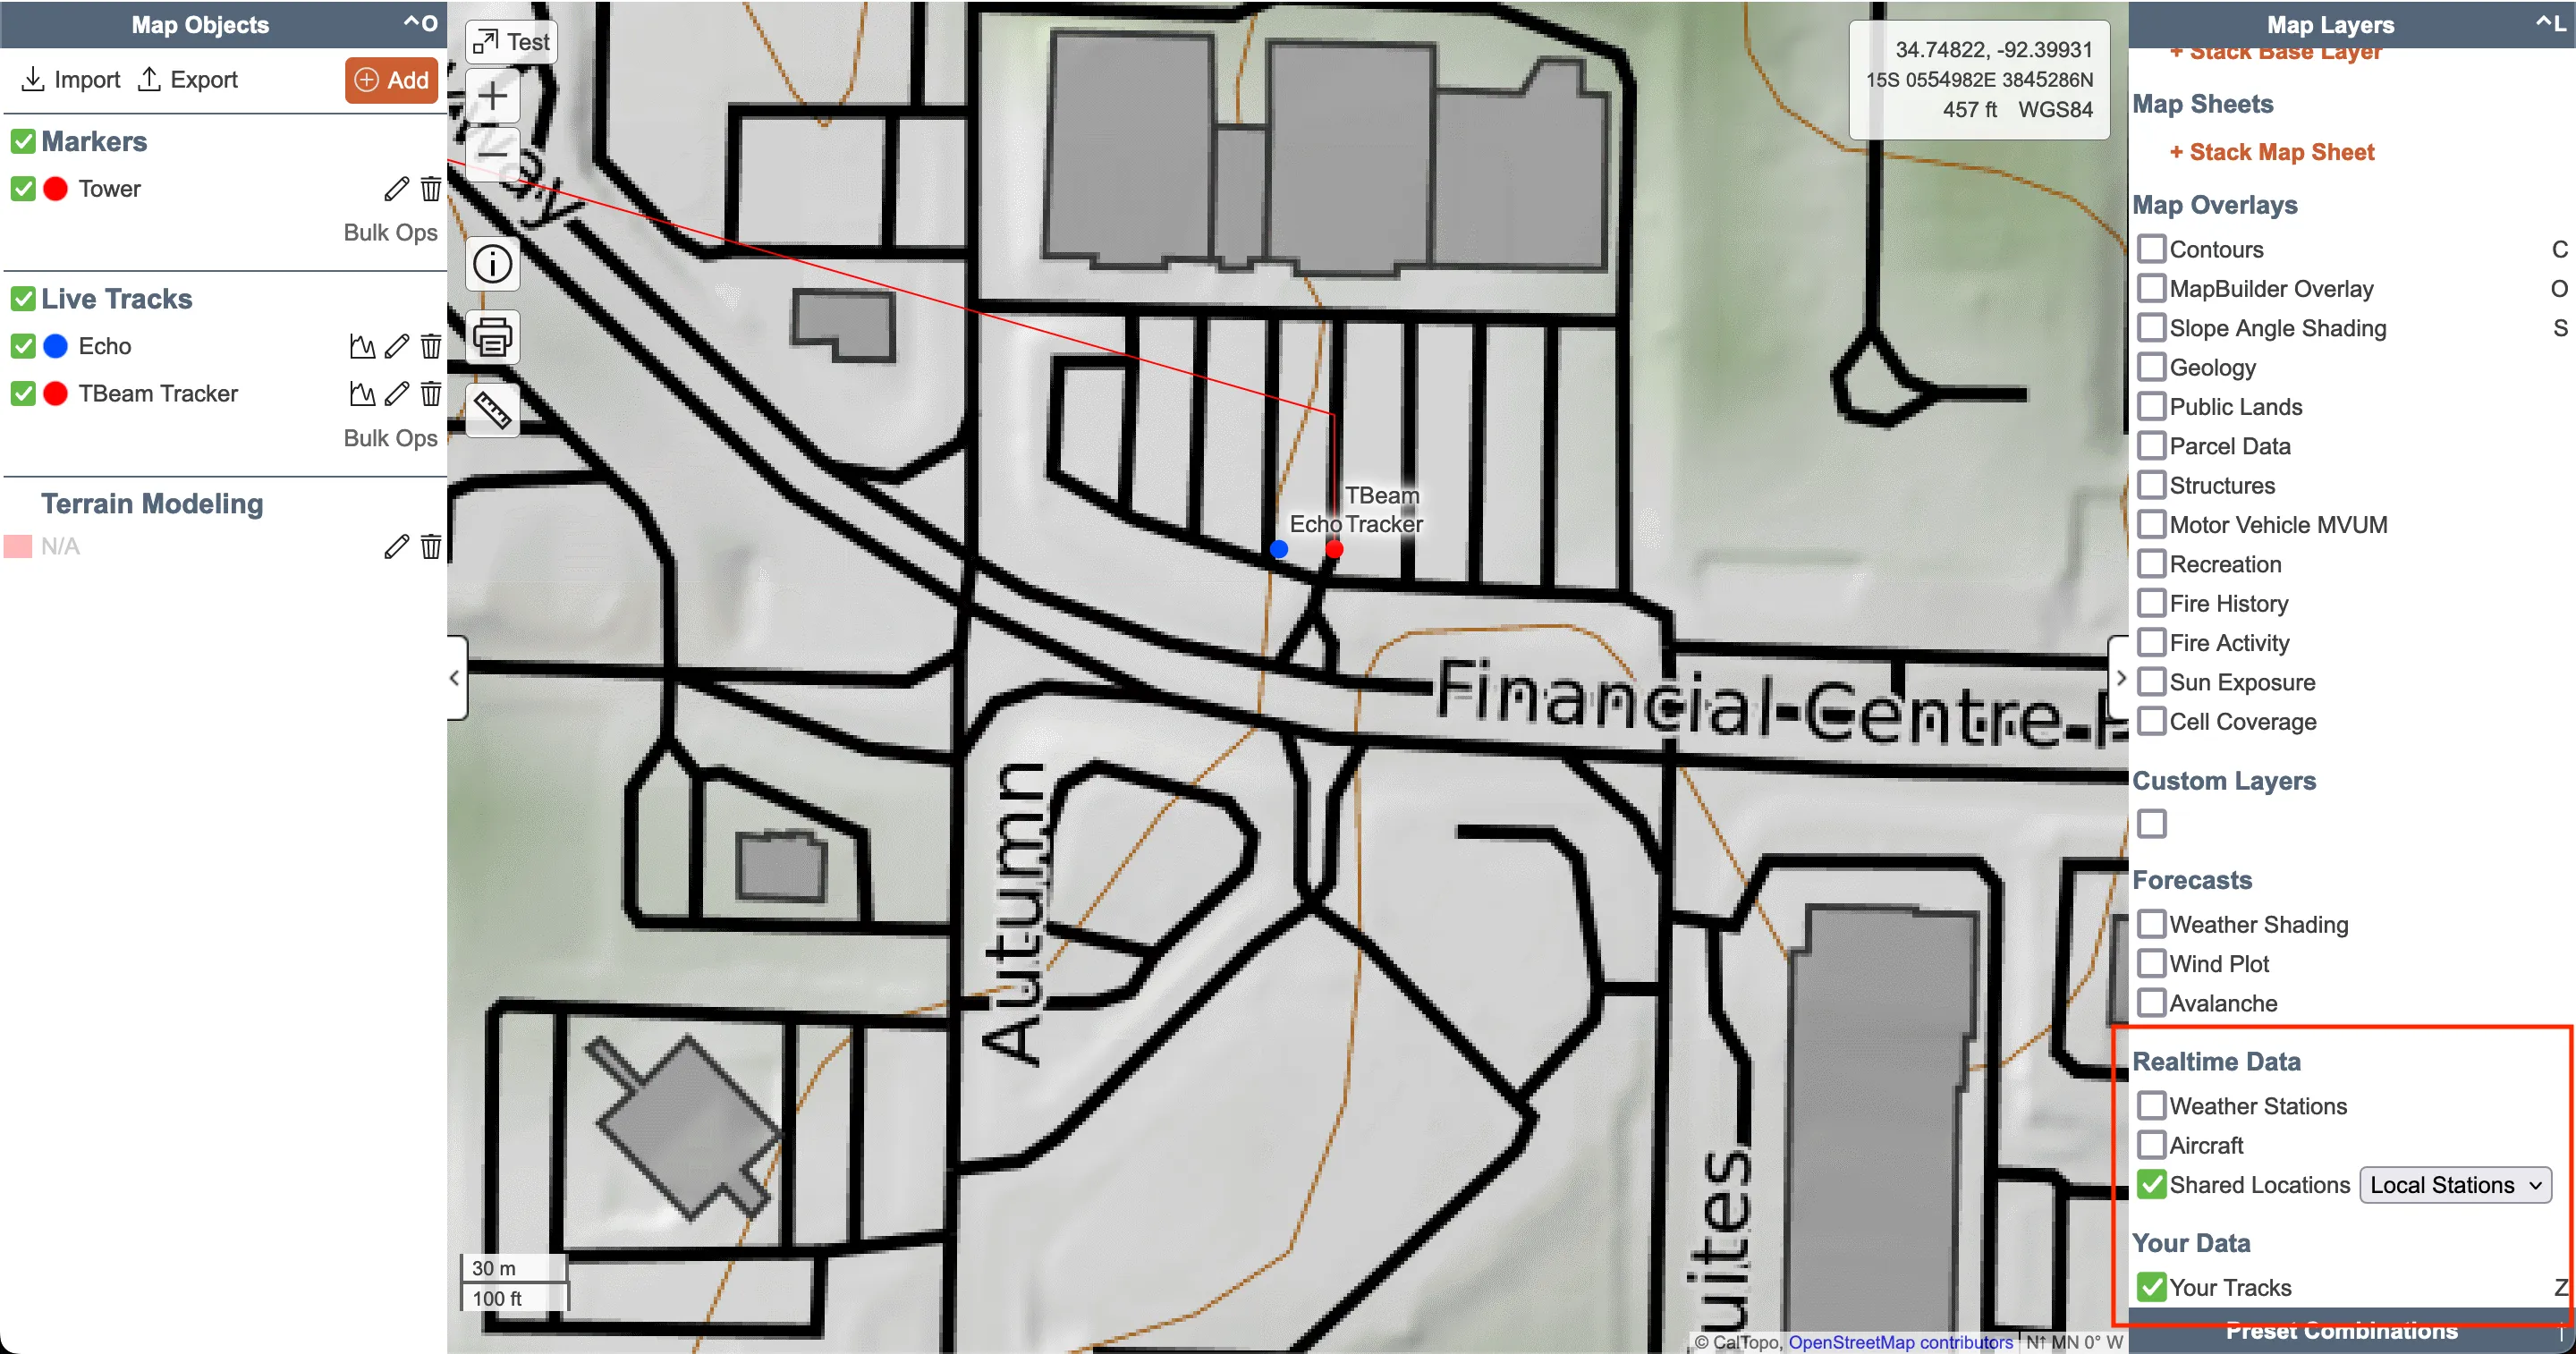
In the desktop's web UI for your CalTopo map, scroll down and check the Shared Locations checkbox under Realtime Data. Your nodes should appear on the map as points if they are connected correctly.
You can click on one or more of the node points and in the resulting tooltip, click Record to Map
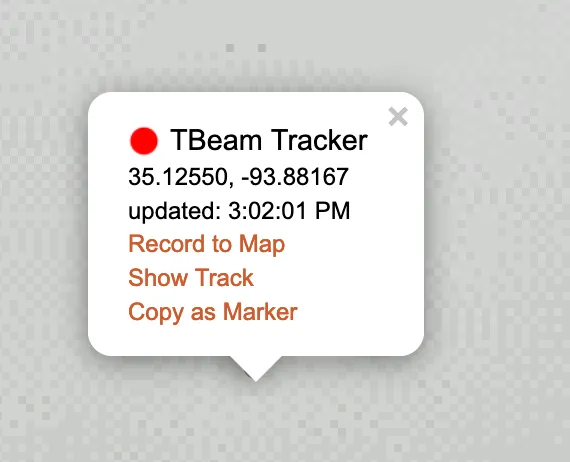
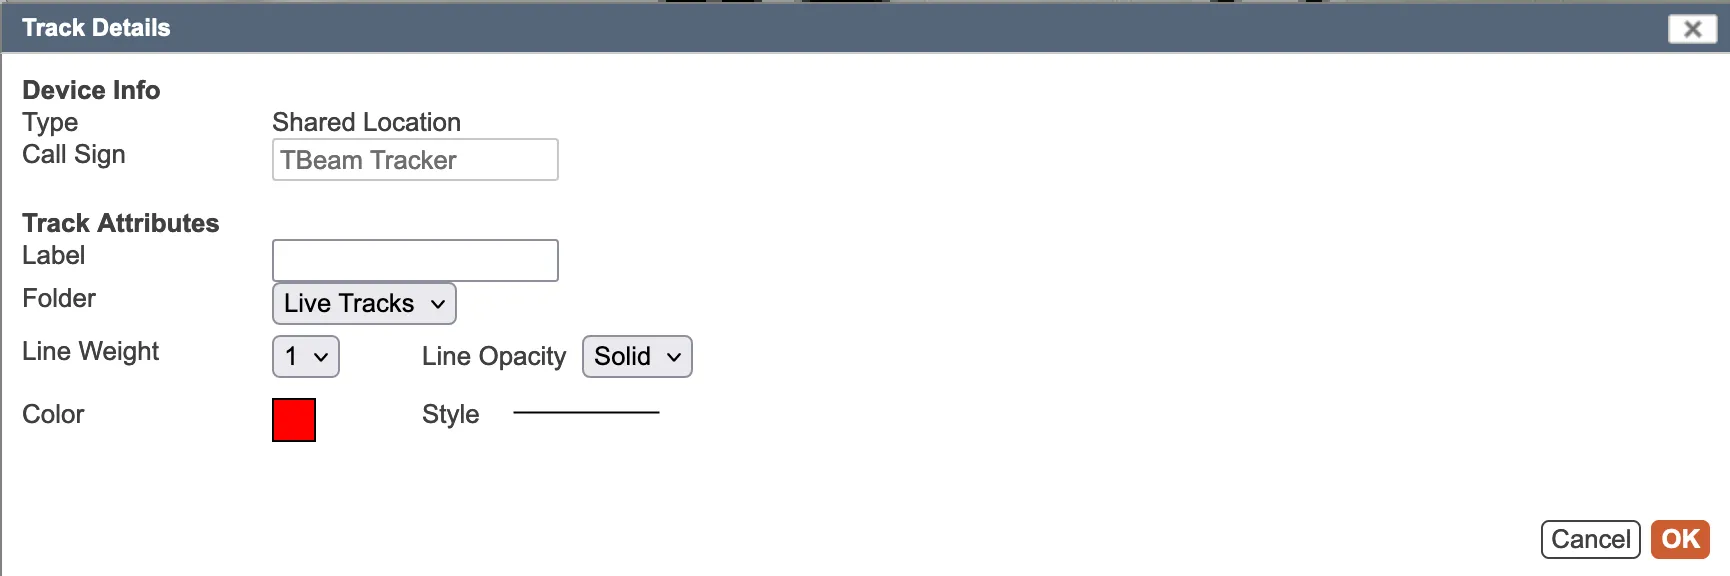
In the resulting dialog, you can assign attributes such as a label or color to the live track created by the node.
When you view the shared map on another device or mobile, the nodes should appear there as well now, if both the desktop and mobile device have internet connectivity.