

What is Meshtastic UI?
Meshtastic UI (MUI) is an independent user interface for Meshtastic devices, designed to provide direct interaction with the network without requiring a phone app for most basic settings. Initially developed for standalone touchscreen devices, MUI has since expanded to support Linux-native systems, making it a versatile solution across different hardware platforms. While many settings can be configured directly, some advanced options may still require pairing with another device, such as a phone.
Development of MUI began around early 2024, and after more than a year of active work, the initial preview was released in early 2025. By that time, it had grown to 12,000 lines of handwritten code, 50,000 lines of generated code, successfully ported to 10 different devices, and translated into 18 languages. MUI will continue to evolve with new features, optimizations, and expanded hardware support.
Supported Devices
MUI is compatible with a variety of devices, including:
- Standalone LoRa devices with ESP32-S3 and a TFT display
- LilyGo T-Deck
- Seeed SenseCAP Indicator
- unPhone
- PICOmputer
- CYD-style devices with ESP32-S3 connected via serial to any LoRa device
- T-HMI
- Mesh-Tab "Replicator" (ESP-4848S040)
- Makerfabs 4"
- Embedded Linux devices with SPI/I2C and GPIOs
- Raspberry Pi
- Milk-V
- LuckFox with TFT SPI and LoRa hat
- Linux native setups
- PC with Meshstick or SIMRadio simulation using X11 MUI
Installation
For most standalone devices, MUI can be installed using the Meshtastic Web Flasher. Look for the MUI logo on supported hardware, select a 2.6+ version firmware, and toggle the Meshtastic UI option on the flash screen.
Some devices are not supported in the web flasher but have prebuilt firmware binaries available. These firmware files can be identified by the "-tft" suffix in the filename. Prebuilt firmware can be found on the downloads page.
Certain supported devices do not have automatic firmware builds or web flasher support. These devices require manual compilation and flashing. Instructions for building firmware manually can be found in the development documentation.
Usage
SD Card Support
For devices with supported SD card slots, ensure the card is properly configured before use. The SD card should be formatted using MBR. MUI supports both FAT32 and exFAT partitions, with exFAT being the recommended format.
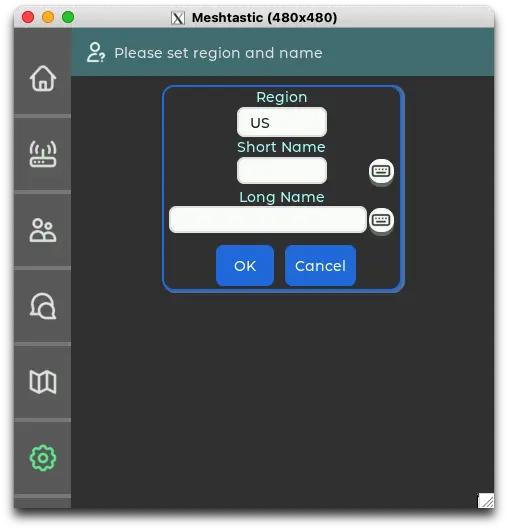
Initial Setup
Upon first booting MUI on a device or after factory resetting a device, the initial screen displayed is a quick configuration screen to set the device's region and both long name and short name. This screen allows these settings to be set at the same time, requiring only one reboot, rather than separately setting each one and rebooting twice.
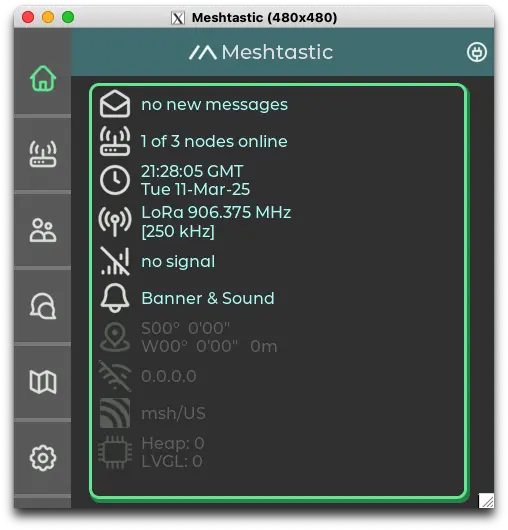
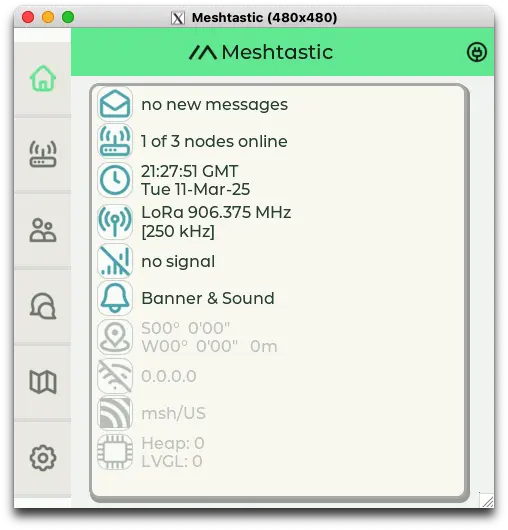
Home Dashboard
The Home Dashboard is the first screen displayed each time the device boots after completing the Initial Setup Screen. It provides a quick overview of the device’s status and allows for fast navigation to select areas or making settings changes. Many elements support both short and long press actions for additional functionality.
For a detailed breakdown of available controls and their functions, refer to the Dashboard Infographic.
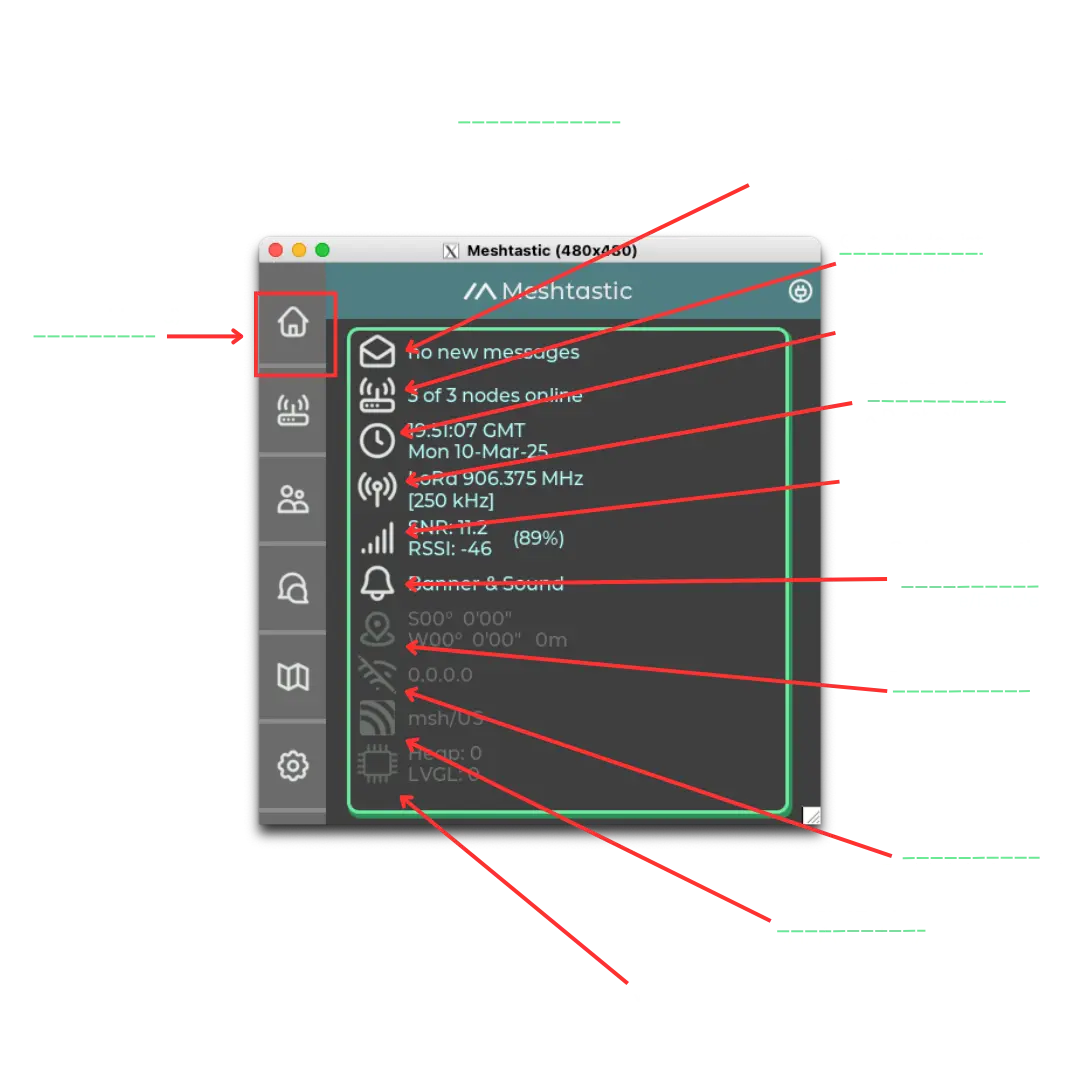
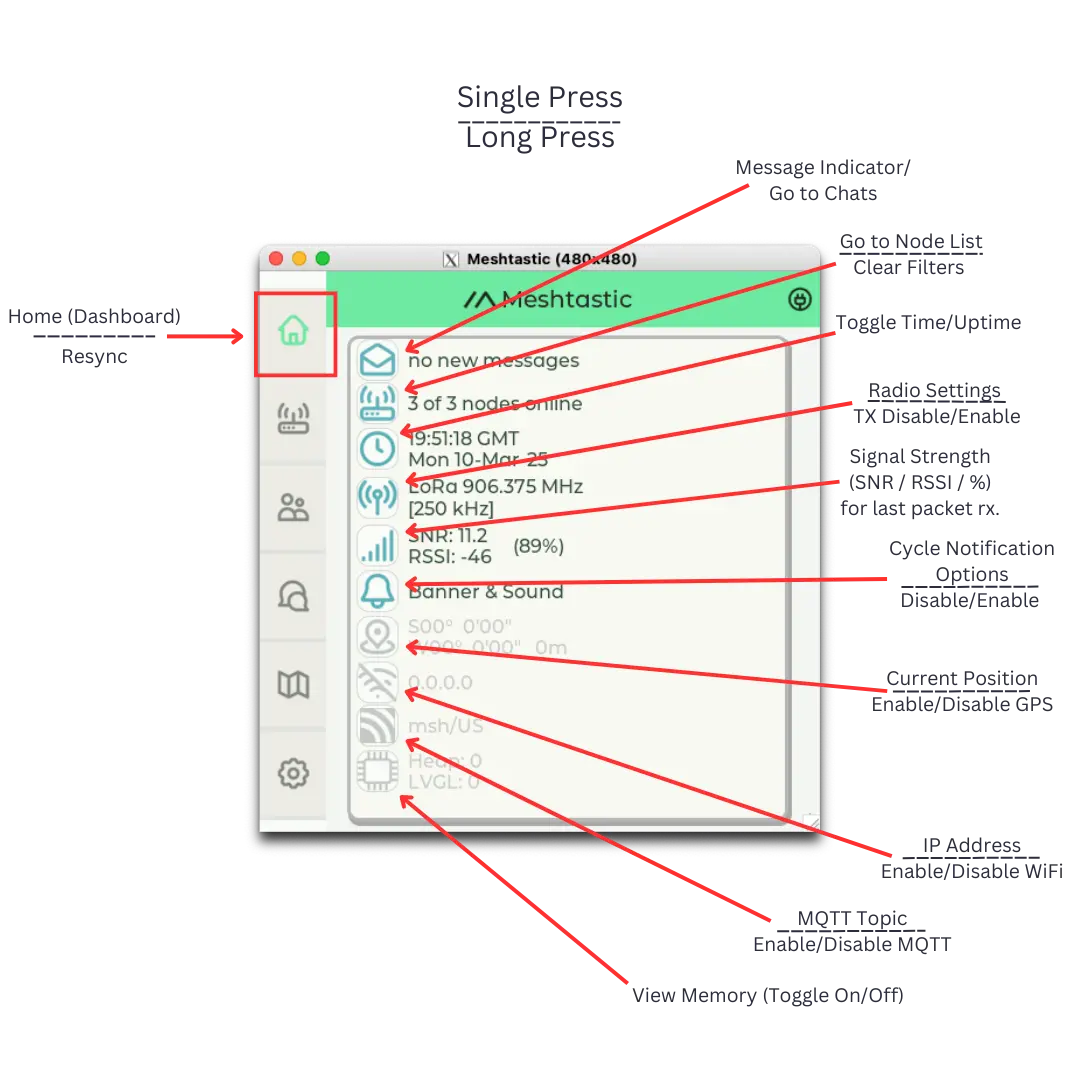


One icon not displayed in the graphic above but visible on standalone devices is the SD Card icon. It indicates the detected SD card's size and format and displays the used storage in both GB and percentage. Tapping the icon will refresh the SD Card status, the firmware may briefly freeze during this process. This is helpful if you have hot swapped the SD Card.
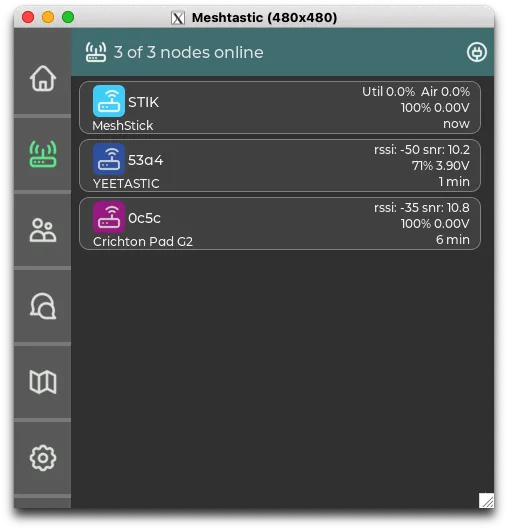
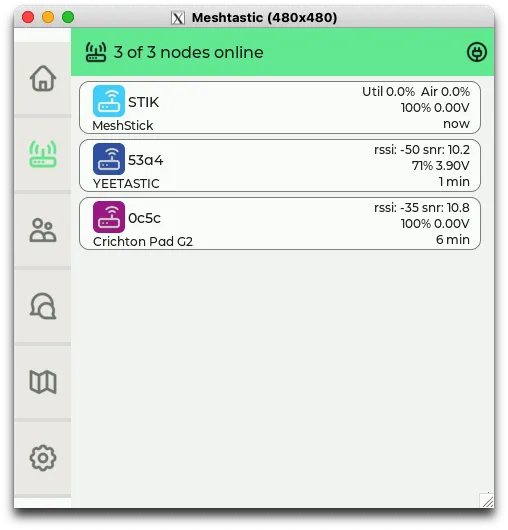
Nodes List
The Nodes list provides a list of all nodes in the mesh network. It allows users to view, filter, and highlight nodes based on selected criteria.
- Single tap on the Node icon will open the Node List, displaying all active nodes in the mesh.
- Long press on the Node icon will open the Node Options, where filters and highlights can be applied.
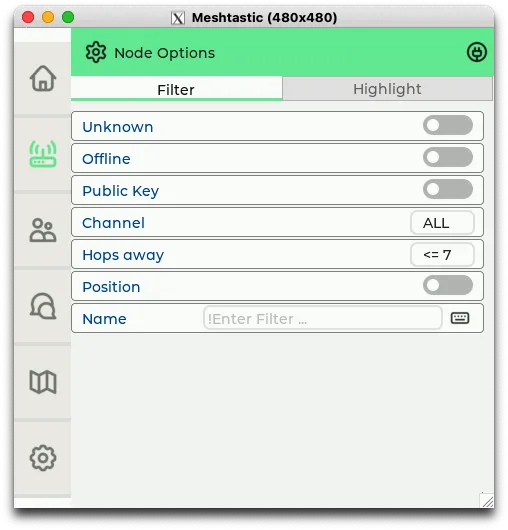
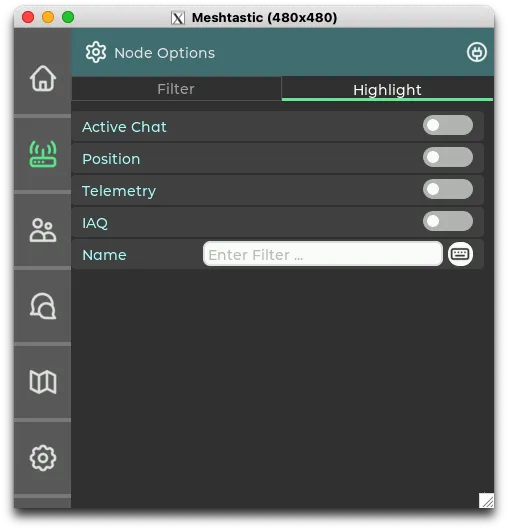
Node Options – Filter
The Filter tab allows users to filter nodes based on selected criteria.

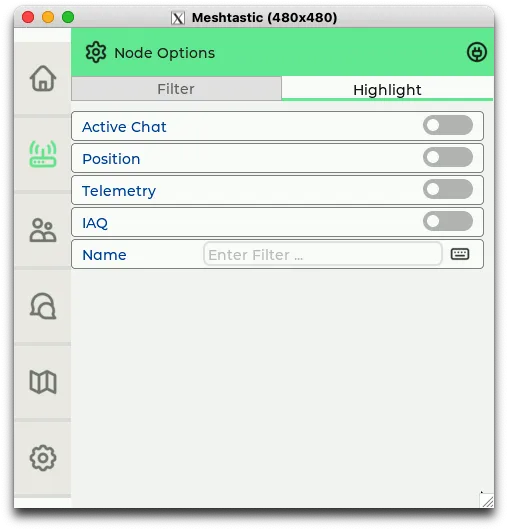
Node Options – Highlight
The Highlight tab allows selected nodes to stand out based on chosen criteria.
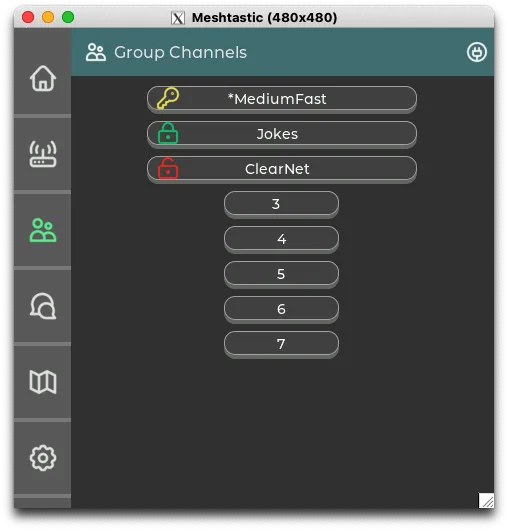
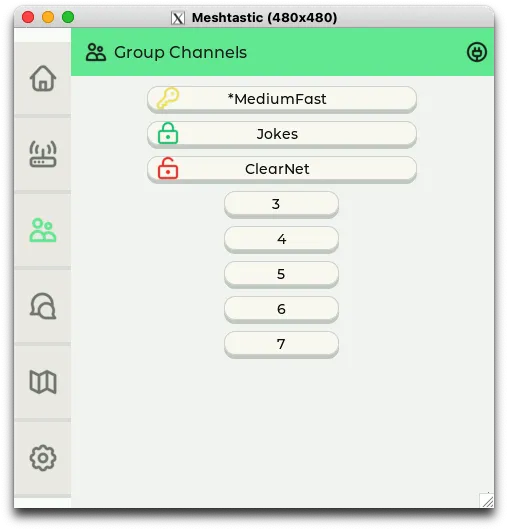
Channels
The Channels screen lists all configured channels for the device. Each channel is represented with an icon indicating its encryption status:
- A yellow key indicates the channel is using a default PSK (Pre-Shared Key).
- A green lock indicates the channel is using a configured PSK.
- A red lock indicates there is no configured PSK for that channel.
Tapping on a configured channel will open a chat for that channel.
Chats
The Chats screen lists all available chats for the device, including both shared channels and direct messages. The chat list can be opened by tapping on the chat icon.

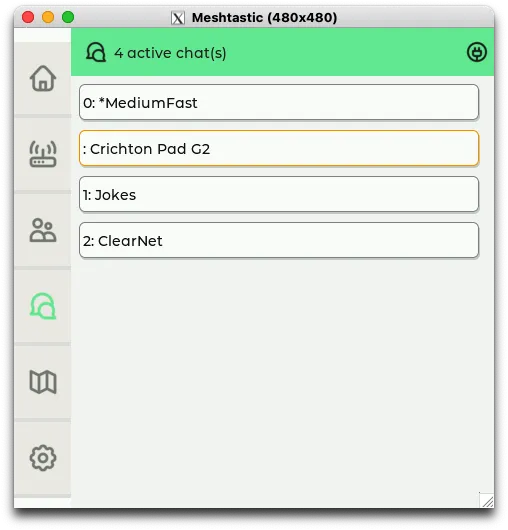
- Long press on a chat reveals a
DELbutton to delete it. - A chat highlighted in orange indicates a new unread message.
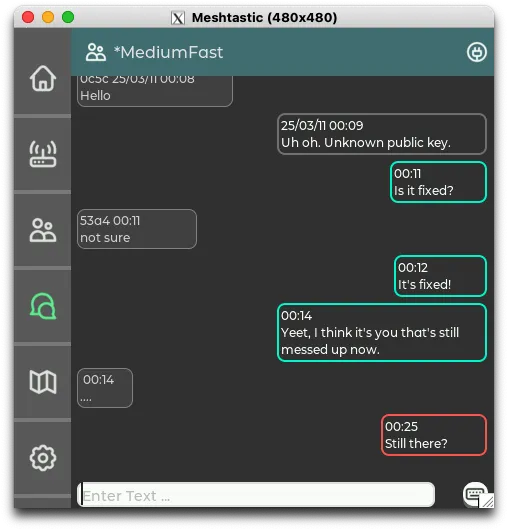
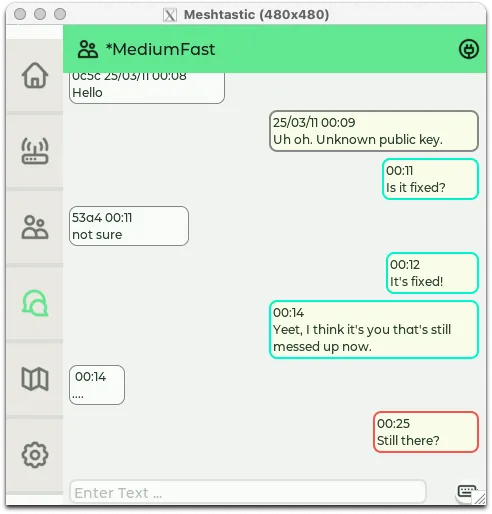
Chat Messages
Inside a chat, messages are threaded:
- Messages from other devices appear on the left.
- Messages from the local device appear on the right.
- When a message is sent, the outline of the message box will update based on its status:
- If an acknowledgment (ACK) is received, the message outline will change to Meshtastic green.
- If max retransmissions are reached and no ACK is received, the message outline will turn red.
- If the message is heard and forwarded by other nodes, and no ack from the intended recipient yet, the message outline will turn yellow.
Map
The map screen displays map tiles stored on the SD card of the device. No map tiles are included, and must be manually added to the SD card in either a /map if using a single style or /maps/{STYLE}/ directory if using multiple styles. Tiles must be 256x256 PNG images and a 256-color palette with 8-bit color depth is recommended.
A starter set of tiles for zoom levels 1-6 covering the Earth is available, along with instructions for obtaining additional map tiles, at this link.
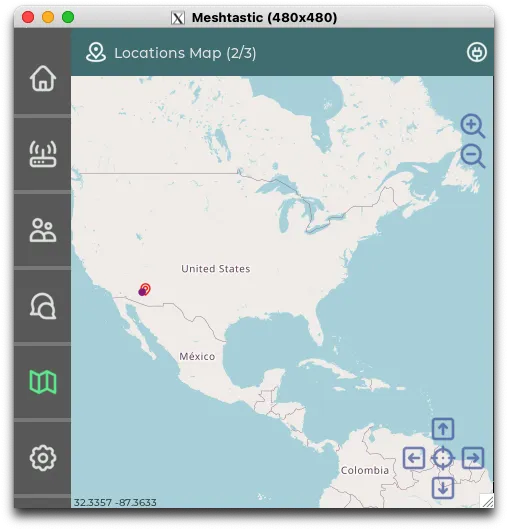
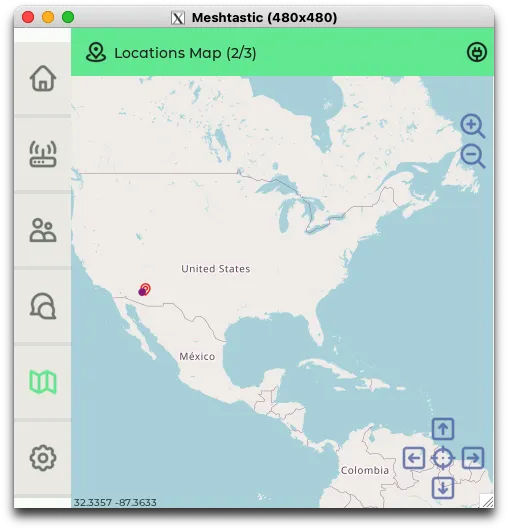
Map Controls
The map screen displays the selected map style and provides interactive controls for navigation:
- Arrow Icons – Move/pan the map view in any direction.
- Magnifying Glass (+/-) – Adjust the zoom level.
- GPS Icon – Centers the map on the device’s current GPS position (if available).
- Crosshairs – Recenter on home position, long press to manually set a new home position.
If no devices with a known location are present and the device itself does not have a location, the map will default to Big Ben in London, UK.
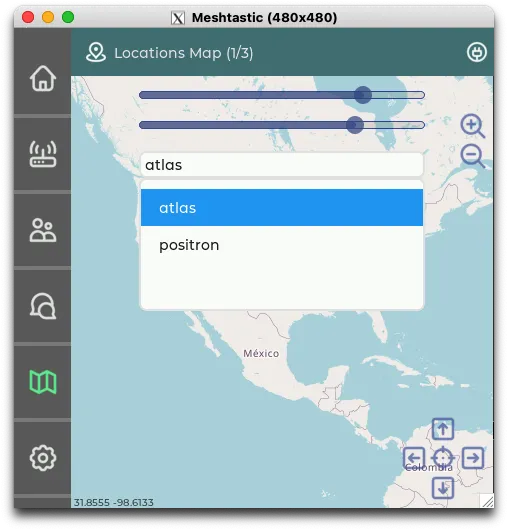
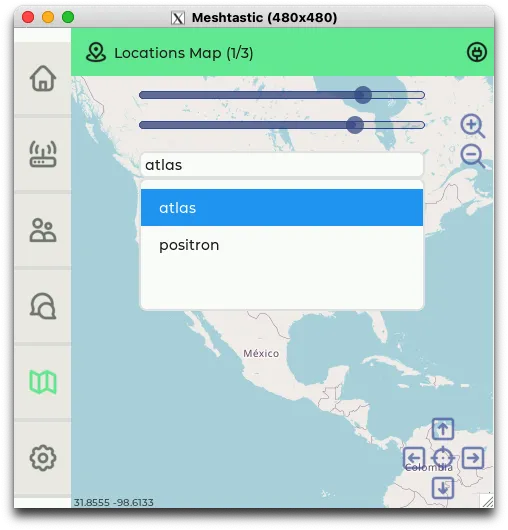
Map Options
The map options menu, which can be accessed by long pressing the map icon, provides the following:
- Brightness and contrast adjustments
- Map style selection (if multiple styles are available)
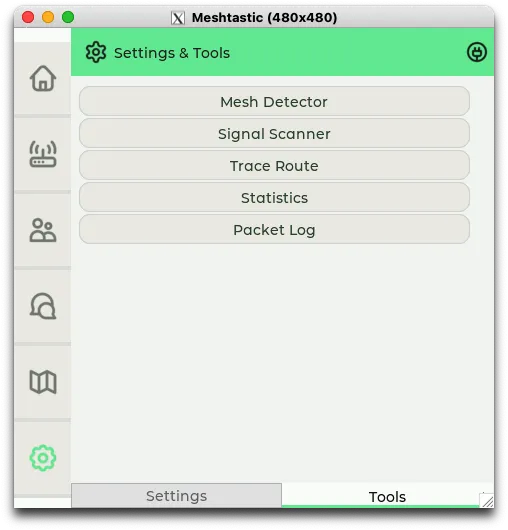
Settings & Tools
The Settings & Tools screen provides access to device configuration and utility functions. It is divided into two tabs:
- Settings – Allows users to configure various aspects of the device from within MUI.
- Tools – Provides utilities for network diagnostics and monitoring.
Accessing Settings & Tools
- Single tap on the settings icon opens the Settings & Tools screen.
- Long press on the settings icon will lock the screen if the lock screen feature is enabled. If the lock screen is disabled, this action will put the device to sleep.
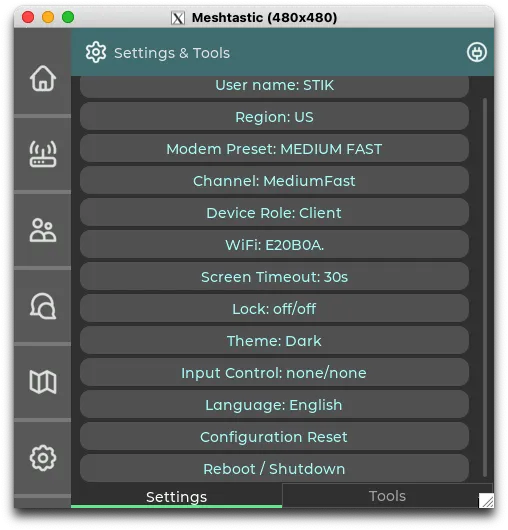
Settings Tab
The Settings tab includes various configuration options which can be set within MUI.

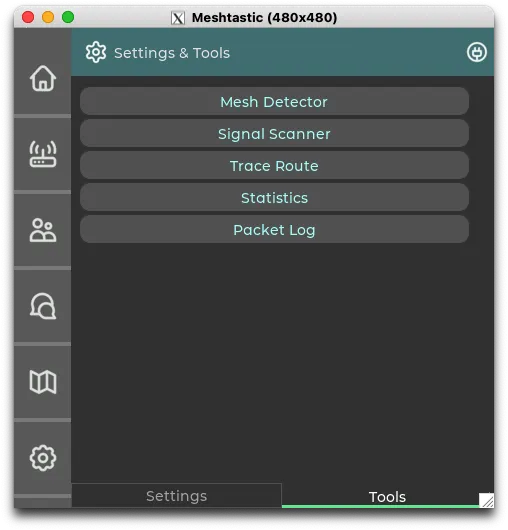
Tools Tab
The Tools tab provides access to various diagnostic utilities, including:
- Mesh Detector – Sends out a nodeinfo request periodically to detect nearby nodes.
- Signal Scanner – Monitors signal strength between selected node to assist with node placement.
- Trace Route – Performs trace route on selected node.
- Statistics – Breaks down received packets by type, such as telemetry, position updates, trace route data, etc.
- Packet Log – Displays a log of transmitted and received packets.
Accessing the Client API
MUI functions as a client, similar to the Android and Apple apps. It runs on one core of the MCU, while the regular Meshtastic firmware runs on the other. MUI communicates with the firmware using the Client API, the same interface used by other Meshtastic clients.
The Client API supports only one active connection at a time, which means other clients cannot be used while MUI is running. Since not all settings can be configured within MUI, you may wish to boot into Bluetooth Programming Mode or BaseUI. This frees up the API so client apps can use the Bluetooth or serial connection.
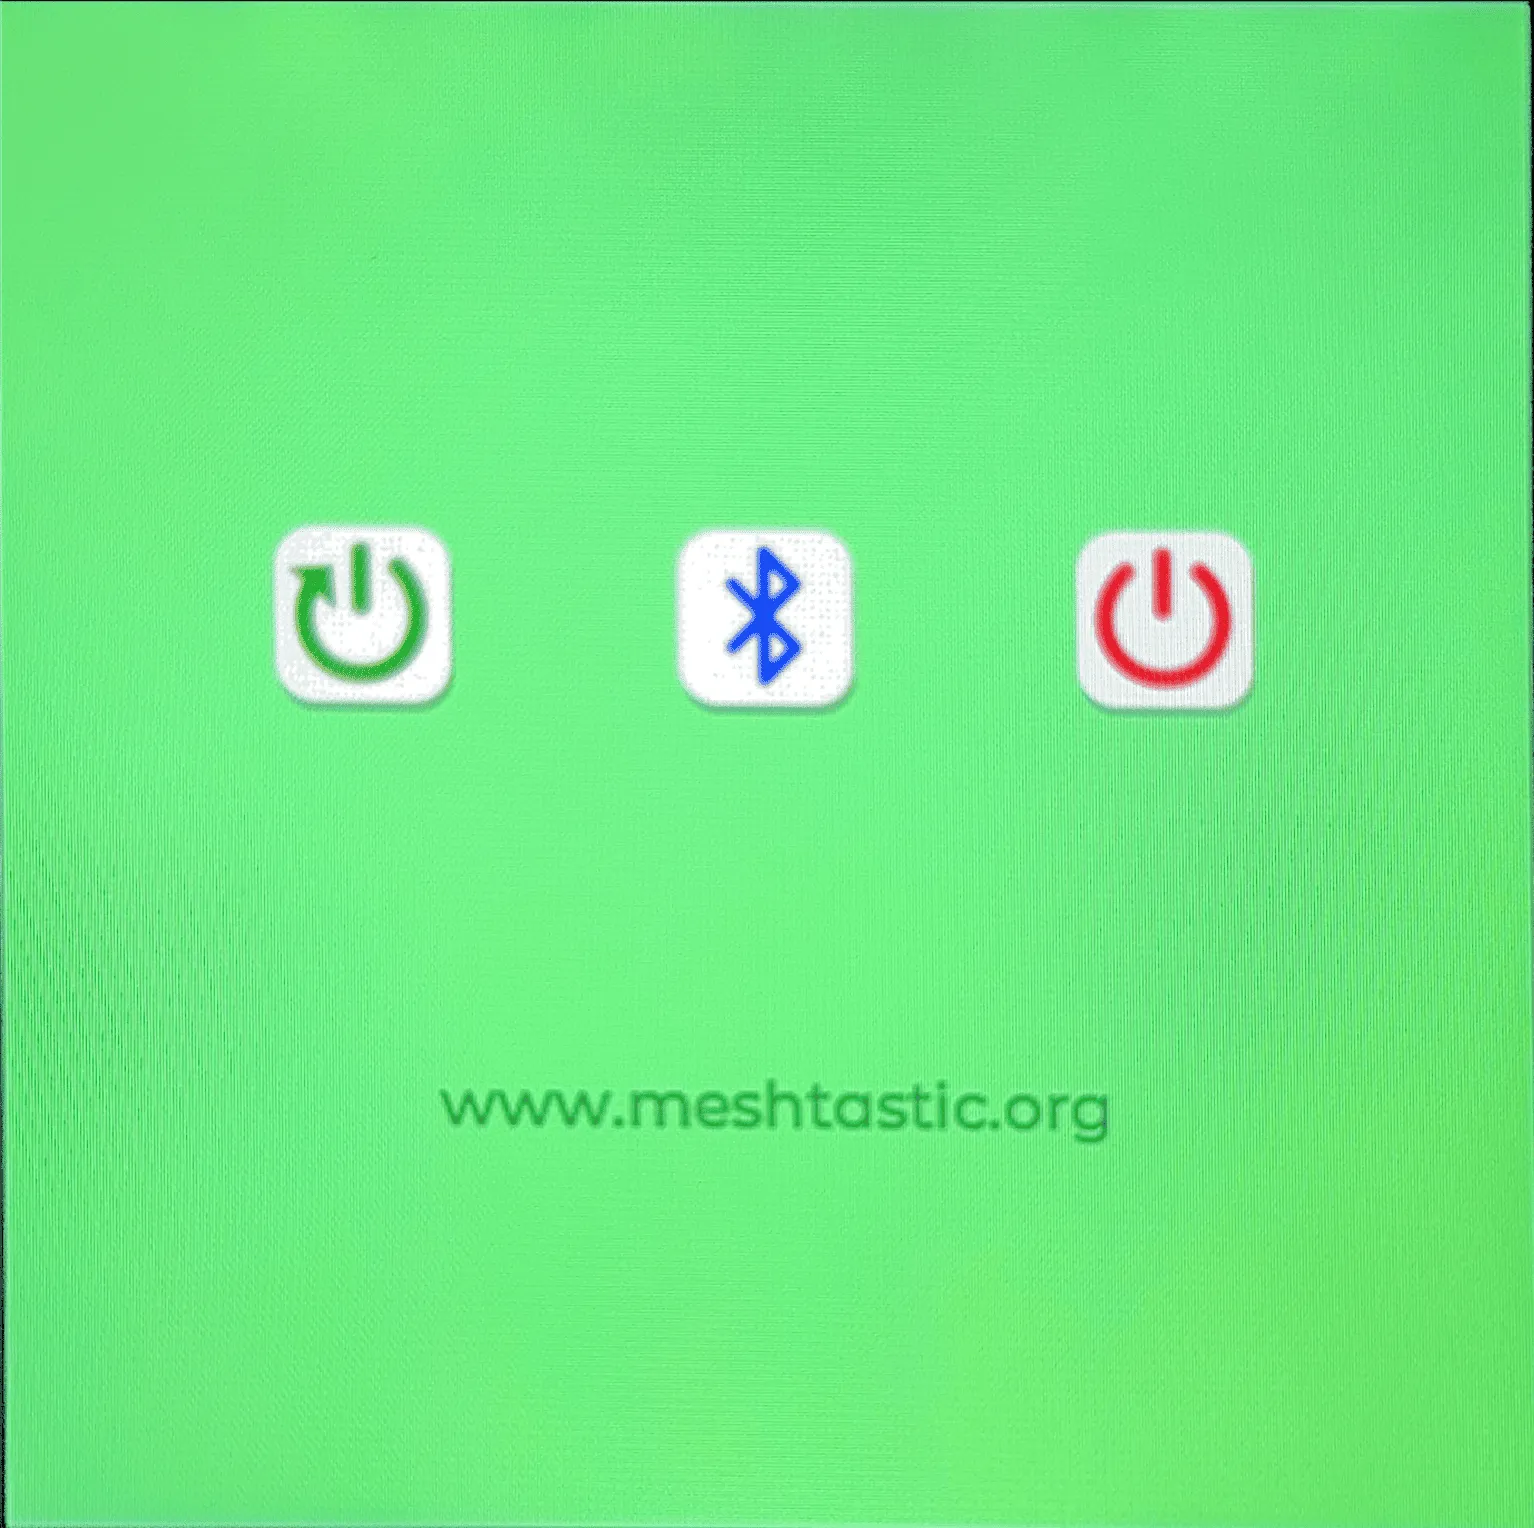
Bluetooth Programming Mode
Bluetooth Programming Mode can be enabled in two ways:
- During boot – Press and hold the Meshtastic logo on the boot screen.
- Press the Bluetooth icon in the shutdown/reset menu within settings.
When activated, the device reboots into Bluetooth Programming Mode. While in this mode, the screen will display a randomly generated PIN, which must be entered when connecting via Bluetooth on the client app.
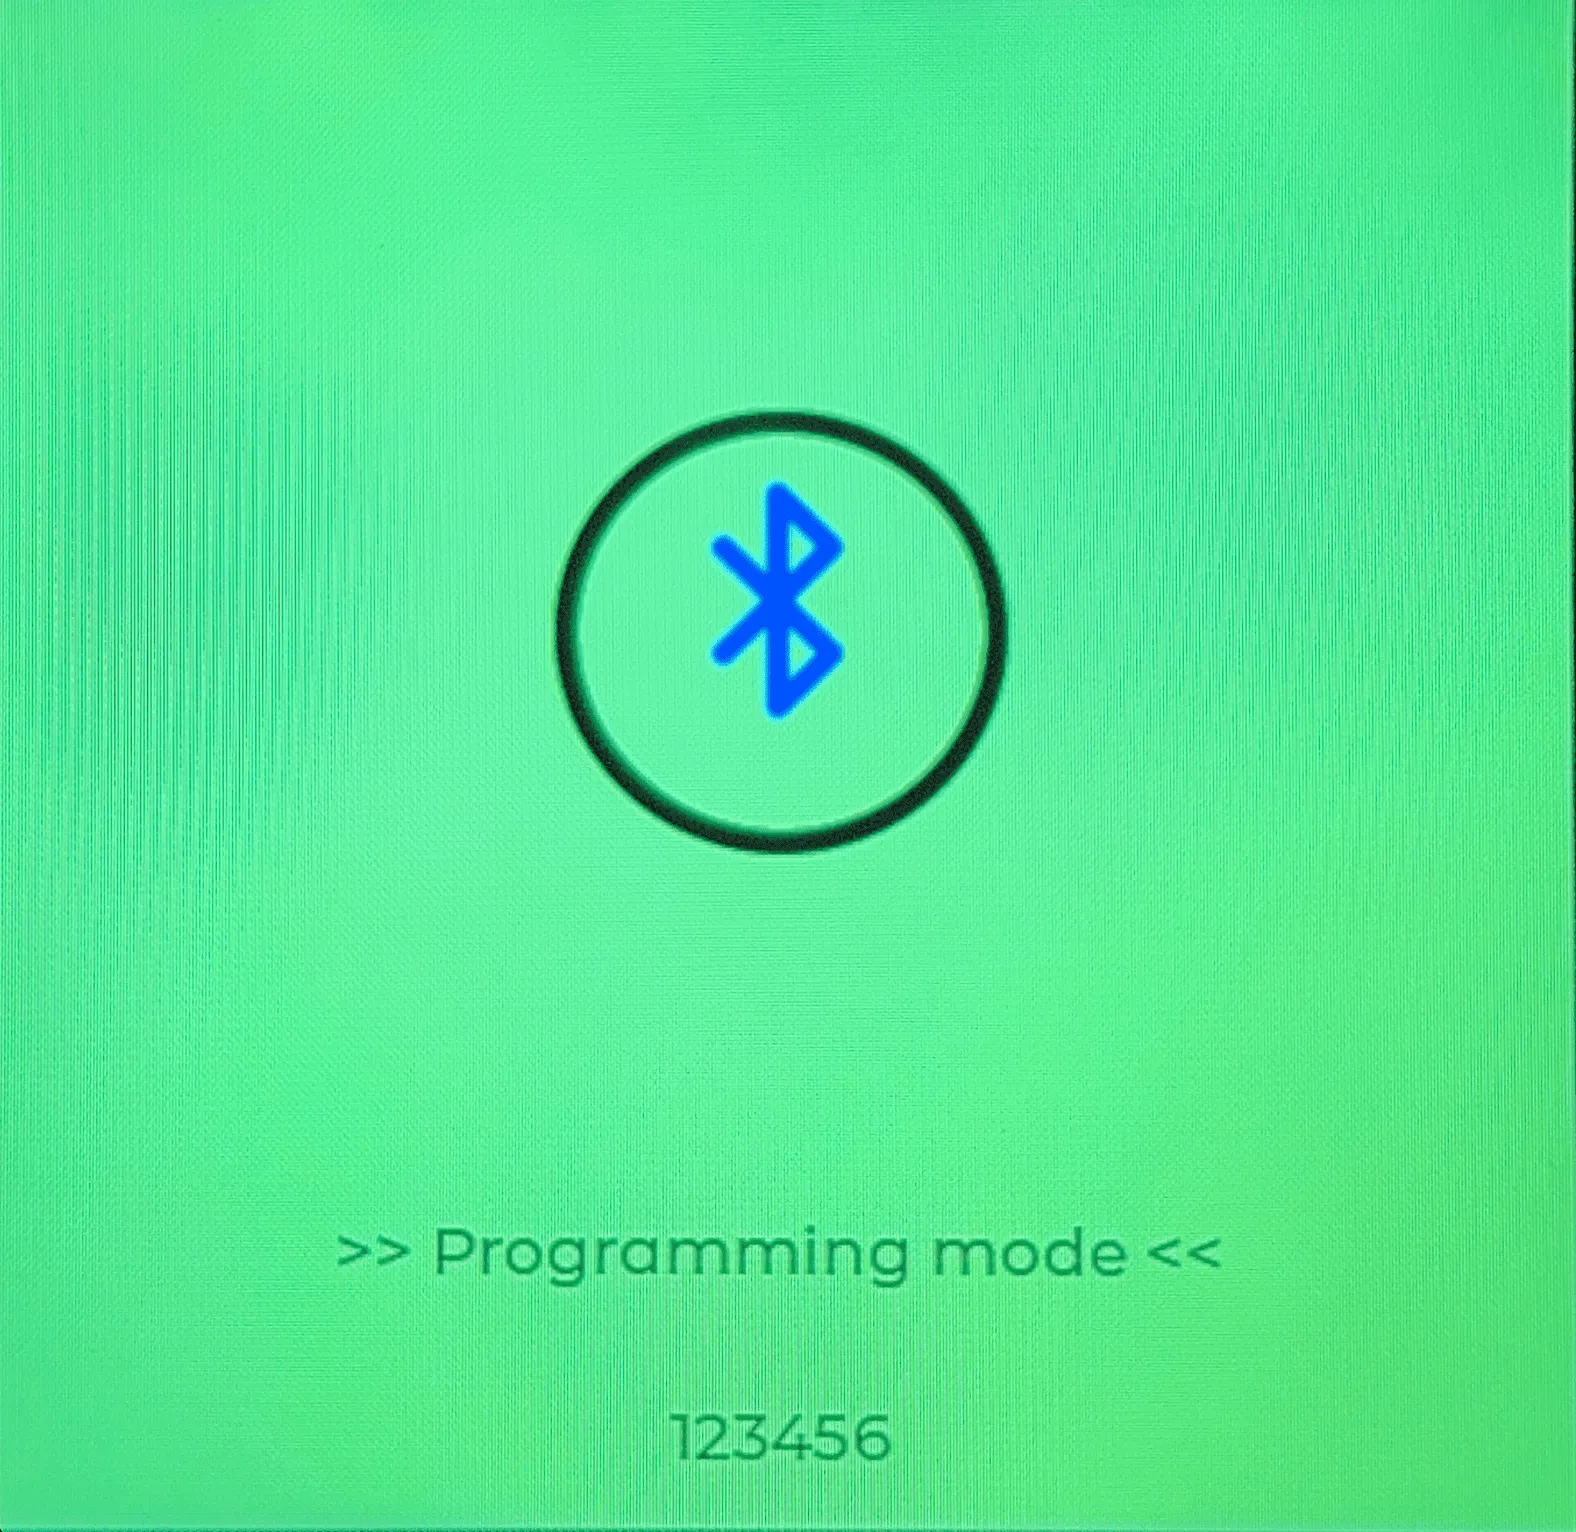
To exit Bluetooth Programming Mode, press and hold the Bluetooth icon. The device will reboot back into MUI.
Booting into BaseUI
Since the introduction of Unified Firmware for TFT devices in version 2.7, you may easily switch between Meshtastic UI and BaseUI without reinstalling firmware. Booting into BaseUI also frees up the Client API connection for other clients.
From the Bluetooth Programming Mode screen, press and hold the Bluetooth icon to reboot into BaseUI.
To swich back to Meshtastic UI from Base UI, navigate to the System Window, then long-press until the System Action dialog is displayed. Select Reboot/Shutdown, then Switch to MUI.